Categories
Cultural & Heritage Recipes

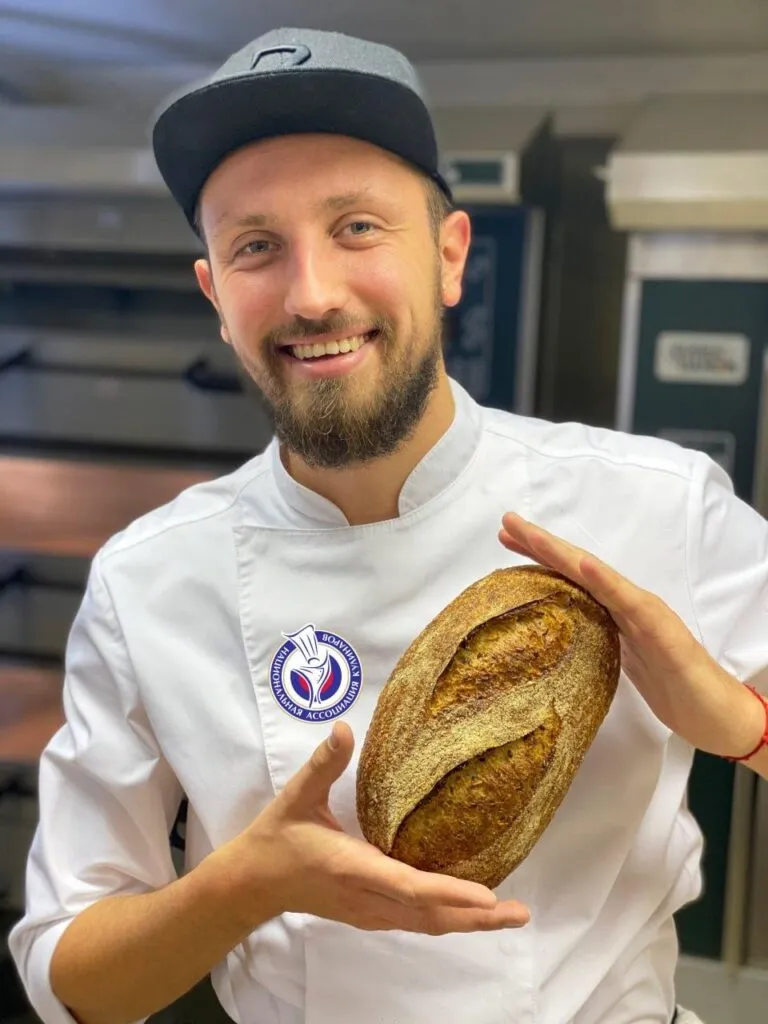
Borodinsky

See below for recipe

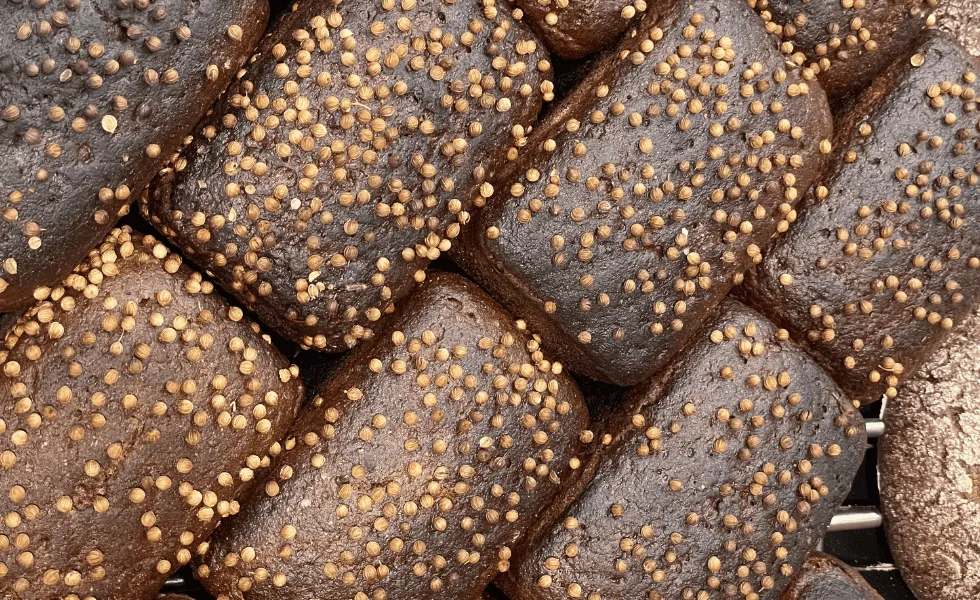
Borodinsky bread is a dark brown sourdough rye bread from Russia.

Borodinsky – Recipe

Adapted by ALLA MISHINA
Ingredients

Starter (Preferment)

  • 22 g 100% rye starter
  • 110 g water
  • 110 g medium rye flour

Scald (Mash)

  • 40 g fermented rye malt
  • 15 g medium rye flour
  • 160 g boiling water (+100°C)
  • 4 g ground coriander (or caraway)
  • 5 g white unfermented malt (or rye flour if not available)

Final Dough

  • 250 g water
  • 200 g rye starter (from above)
  • 200 g scald (all of it)
  • 280 g medium rye flour
  • 90 g wheat flour (bread or all-purpose)
  • 35 g honey or sugar
  • 10 g salt
  • Coriander seeds for topping
Bread-master Ivan Zabavnikov
Instructions

Starter (Preferment)

  1. Mix the starter, water, and flour.
  2. Leave to ferment for 10–12 hours at room temperature (24–26°C).

Scald (Mash)

  1. Mix the flour, fermented malt, and coriander.
  2. Pour over with boiling water, stir well, and then add the unfermented malt (or rye flour).
  3. Stir again and leave in a covered non-plastic container for at least 2–3 hours.
  4. Ideally, keep it in the oven at 62–65°C, or in a thermos overnight. At room temperature, the scald can safely stand for up to 12 hours; afterwards, refrigerate or use immediately.

Final Dough

  1. In a mixer — add ingredients in the order listed:
    • 250 g water
    • 200 g rye starter (from above)
    • 200 g scald (all of it from above)
    • 280 g medium rye flour
    • 90 g wheat flour (bread or all-purpose)
    • 35 g honey or sugar
    • 10 g salt
    • Coriander seeds for topping
  2. Mix for 10–15 minutes on low speed using a paddle or dough hook.
  3. By hand — add all ingredients except 50 g of the water. Knead the dough for 8–10 minutes using your fist, dipping it occasionally into the reserved water to gradually incorporate it.
  4. Cover the dough and let it ferment for 2.5–3 hours at 28–35°C.

Shaping and Proofing

  1. After fermentation, divide the dough into 400–800 g pieces (depending on your baking tins).
  2. Shape the loaves “through water” (with wet hands) and place them into greased tins (use butter, vegetable oil, or baking spray).
  3. Sprinkle coriander on top.
  4. Let proof for 60–70 minutes at 24–28°C, until increased in volume by about 1.5× and small “craters” appear on the surface.

Baking

  1. Bake at 250°C with steam for 10 minutes, then 40–45 minutes at 180–190°C with convection.
  2. After baking, remove the loaves from the tins and cool completely on a wire rack.

Note for new baking tins:

If using new tins, mix flour and vegetable oil in a 1:1 ratio to grease them. This prevents the bread from sticking to the sides. However, butter works even better.

For more recipes, visit www.worldchefs.org/news.

Categories
Cultural & Heritage Recipes

Baurebrout – Luxembourg Farmhouse Bread

See below for recipe

Recipe by Carlo Bock, Luxembourg

Baurebrout (Luxembourg Farmhouse Bread) – Recipe

PROVIDED by BEN WEBER

Yields: 3 x 565 g loaves OR 6 x 565 g loaves OR 9 x 565 g loaves

Ingredients

Sourdough Starter (Fermentation: 8 hours at 28° C)

IngredientSmall BatchMedium Batch Large Batch
Rye Flour (Type 997)300 g600 g900 g
Water240 g480 g720 g
Starter Culture30 g60 g90 g
Total570 g1140 g1710 g

Main Dough

IngredientSmall BatchMedium BatchLarge Batch
Mature Sourdough540 g1080 g1620 g
Wheat Flour (Type 650)700 g1400 g2100 g
Salt22 g44 g66 g
Fresh Yeast20 g40 g60 g
Water410 g820 g1230 g
Total1692 g3384 g5076 g
Dough Parameters:
  • Dough temperature: 25° C
  • Kneading time: 1st speed: 4 minutes, 2nd speed: 5 minutes
Instructions

Bulk Fermentation:

  • Rest dough 2 x 20 minutes.
  • After first 20 minutes➔ stretch & fold.
  • After second 20 minutes ➔ scale and pre-shape into rounds.

Final Proof:

  • Place dough rounds seam-side up in floured bannetons.
  • Proof for ~40 minutes at room temperature.

Baking:

  • Turn loaves out onto a baking tray.
  • Score the tops in a cross pattern.
  • Bake at 230° C with steam for 35 minutes.
  • After ~15 minutes, release the steam and reduce oven to 210° C.
  • Bake until crust is crisp and golden.

■ Serving Suggestion: This rustic farmhouse bread pairs beautifully with Luxembourgish ham, cheese, or a hearty stew. Its crisp crust and tender crumb reflect Luxembourg’s rich baking tradition.

For more recipes, visit www.worldchefs.org/news.
Categories
Cultural & Heritage Recipes

Parker House Rolls

See below for recipe

History of Parker House Rolls

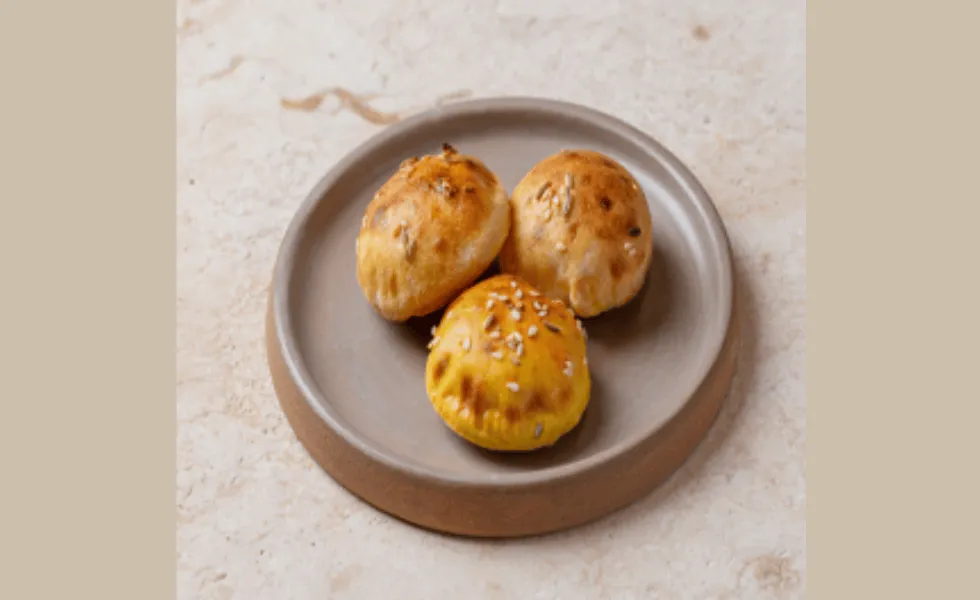
Parker House Rolls are a type of sweet, soft, and buttery bread roll. They have been a staple in American cuisine for over a century. The rolls originated at the Parker House Hotel in Boston, Massachusetts, the first luxury hotel in the United States. The hotel’s chef, a man named M. Antoine, is credited with creating the recipe for the rolls in the 1870s. The rolls quickly became a favorite among the hotel’s guests. Their popularity soon spread to other parts of the country.

The original recipe for Parker House Rolls has remained largely unchanged to this day. It is still a closely guarded secret. However, it is known that the rolls are made with a combination of flour, yeast, sugar, and butter, which gives them their distinctive flavor and texture. The rolls are also known for their unique shape, which is achieved by folding the dough over itself before baking. This process creates a soft, fluffy interior and a crispy, golden-brown exterior that is characteristic of Parker House Rolls. Over the years, the rolls have become a beloved American treat. They are often served at special occasions such as holidays and weddings.

Cultural Significance

In terms of its cultural significance, the Parker House roll has played a notable role in American food culture, with many restaurants and bakeries offering their own versions of the roll. The roll’s popularity has also been fueled by its appearance in various media outlets and cookbooks, further solidifying its place in American culinary history. As we continue to celebrate the Parker House roll and its enduring legacy, we are reminded of the power of food to bring people together and create lasting memories.

The story of the Parker House roll serves as a testament to the importance of preserving traditional recipes and baking techniques, while also embracing innovation and creativity in the culinary world. As we look to the future of American baking, it is clear that the Parker House roll will remain a beloved classic, cherished by generations to come. With its rich history, delicious flavor, and enduring popularity, the Parker House roll is an integral part of American culinary culture.

Secrets to Parker House Rolls

Due to the natural tendency of yeast dough to both stretch and shrink as you work with it, don’t stress when you don’t end up with rolls that are all the same size. Just arrange them however they best fit to cover most of the bottom of the pan—a shorter one next to a longer one, etc. When they rise and bake, no one will care about size perfection.

The “original” Parker House roll recipe calls for the dough to be cut in circles, dipped in butter, and folded over. However, having tried this rather messy process in the past, and ending up with rolls that popped open in the oven, rather than hold their shape (and their buttery pocket), Chef John Coletta has opted for a slightly different method. The result? Softly rounded rectangular rolls, looking very much like the rolls served these days at the Omni Parker House hotel—still a Boston landmark after all these years.

Parker House Rolls – Recipe

Adapted by JOHN COLETTA

Yields 16 roll servings

Ingredients
  • 360g. Flour; Bread; Organic
  • 8g. Yeast; Instant
  • 40g. Sugar; Granulated
  • 8g. Salt; Sea; Fine Grind
  • 50g. Flour; Potato
  • 45g. Butter; Unsalted; Room Temperature
  • 230g. Milk; Pasteurized; Whole
  • 1 Egg; Extra Large
  • 60g. Butter; Unsalted, Melted For Brushing
Instructions
  1. Weigh your flour; or measure it by gently spooning it into a cup, then sweeping off any excess. In a large mixing bowl, or in the bowl of an electric mixer, fitted with a dough hook.
  2. Place all of the ingredients (except the 60g) melted butter at the end), mixing to form a shaggy dough.
  3. Note: to speed the rising process, whisk together the milk and egg. Heat gently, just enough to remove the refrigerator chill; then add to the remaining ingredients.
  4. Knead the dough, by hand (10 minutes) or by machine (7 to 8 minutes) until it’s smooth.
  5. Place the dough in a lightly greased bowl or 2 liter measure (so you can track its rising progress). Allow it to rise for 90 minutes; it’ll become quite puffy, though it probably won’t double in bulk. Note: the dough takes quite a while to get going. After 1 hour, it may seem like it has barely expanded at all. But during the last half hour, it rises more quickly.
  6. Transfer the dough to a lightly greased work surface. Divide it in half. Working with one half at a time, roll or pat the dough into a 20 x 30 cm rectangle.
  7. Brush the dough all over with a light coating of the melted butter. You’ll have butter left over; you’ll need it for the other half of the dough, as well as for brushing on top of the baked rolls.
  8. Cut the dough in half lengthwise, to make two 10 x 30 cm” rectangles. Working with one rectangle at a time, fold it lengthwise to about 1.50 cm of the other edge, so the bottom edge sticks out about 1.50 cm beyond the top edge. You’ll now have a rectangle that’s about 6 x 12 cm. Repeat with the other piece of dough.
  9. Cut each of the rectangles crosswise into four 7.50 cm pieces; making a total of 8 folded rolls, each about 6 x 7.50 cm. Flip the rolls over (so that their smooth non-folded side is facing up), and place them in a lightly greased 23 x 30 cm pan. Repeat with the remaining piece of dough, making 16 rolls in all. You’ll arrange 4 rows of 14 cm the pan, with the longer side of the rolls going down the longer side of the pan. Gently flatten the rolls to pretty much cover the bottom of the pan.
  10. Cover the pan, and let the rolls rise for about 45 minutes to 1 hour, until they’re puffy but definitely not doubled. Towards the end of the rising time, preheat the oven to 180°C.
  11. Bake the rolls for 20 to 25 minutes, until they’re golden brown and feel set.
  12. Remove them from the oven, and brush with the remaining melted butter. Pull them apart to serve.

For more recipes, visit www.worldchefs.org/news.
Categories
Cultural & Heritage Recipes

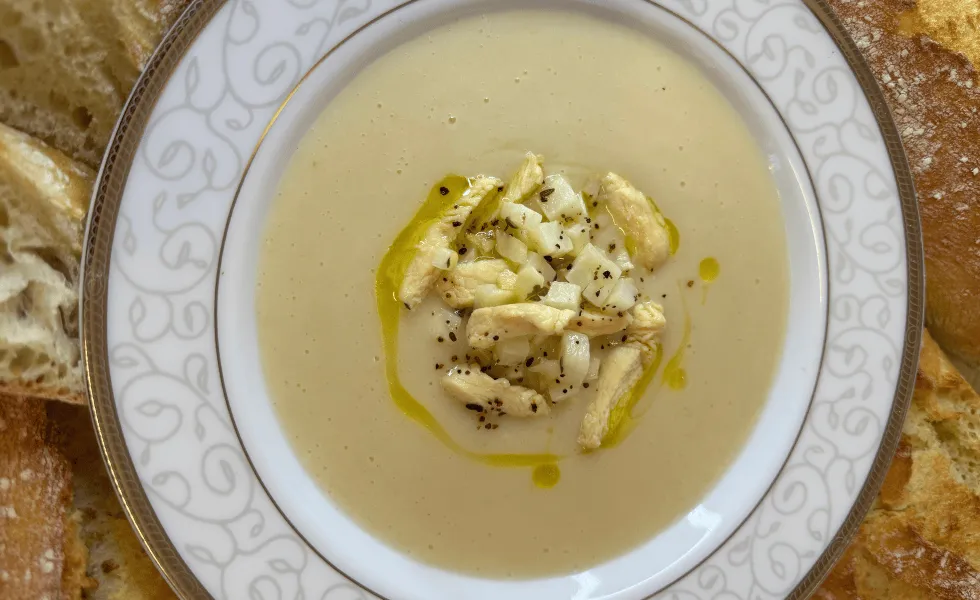
“Pana’ vicentina” with Chicken and Celeriac

See below for recipe

Bread has always been a universal symbol of nourishment, sharing and memory—present on the tables of every generation. It has accompanied the history of people’s food, becoming not only a daily staple, but also an object of respect, and for many, almost sacred. Our grandparents and parents instilled in us the importance of not wasting bread.

It is precisely from this attention and a genuine deep-rooted culture of recycling that extraordinary recipes were born throughout Italy that give new life to leftover bread. We have simple, yet flavorful dishes, ranging from desserts, to stuffed pasta, from breading to peasant soups. Even today, these preparations continue to live on, reinterpreted in a modern and creative way.

This recipe is a simple and authentic soup, typical of the Italian province Vicenza. It is made with stale bread and vegetable broth, but in the past, those who could afford to used chicken broth to make it richer. A humble dish, this recipe tells stories of family, tradition and respect for what you have.

“Pana’ vicentina”  with Chicken and Celeriac – Recipe

Adapted by GIANLUCA TOMASI

Yields 4 servings

Ingredients
  • 400 g stale bread without crust
  • 0,8 liter chicken broth
  • 40 g grana Padano cheese
  • 30 g onion
  • 100 g celeriac
  • 100 g chicken breast
  • Extra virgin olive oil
  • Black pepper
  • Salt
  • Thyme
Instructions
  1. Brown the onion in a little oil.
  2. Add the bread crumbs and then pour in the broth.
  3. Continue cooking over low heat for 30 minutes.
  4. Add the cheese and blend finely.
  5. Cut the chicken breast into small pieces and cook in a pan with a little oil for a few minutes.
  6. Pour the cream onto each plate, add the celery and chicken, and season with pepper and extra virgin olive oil.

For more recipes, visit www.worldchefs.org/news.
Categories
Cultural & Heritage Recipes

Daktylia

See below for recipe

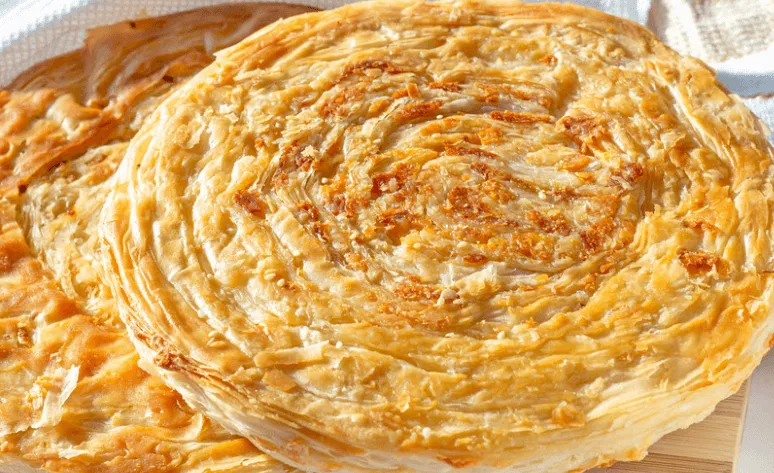
Daktylia is an Easter Meditteranean bread, originally from Greece but commonly found across Cyprus and Turkey.

Daktylia – Recipe

Adapted by Nikolas Konstantinou
Ingredients
  • Farina flour, 1000 gr.
  • Country style flour, 1000 gr.
  • Yeast, 24 gr.
  • Salt, 24 gr.
  • Sugar, 80 gr.
  • Shortening (Spry), 30 gr.
  • Cinnamon powder, 2 gr.
  • Mastic, 3 gr.
  • Mahlab, 1 gr.
  • Water, 1100 gr. +/-

For the Coating:

  • Sesame seeds, 100 gr.
  • Black sesame seeds, 10 gr.
  • Anice seeds, 5 gr.

Equipment:

  • Scale
  • Dough mixer
  • Mixing bowls
  • Cooking trays
Instructions
  1. Place all the ingredients in the dough mixer. Mix the dough on medium speed for 10 minutes.
  2. Cut the dough into your desired portion size (500g is ideal for one “Daktylia”).
  3. Shape the dough into long, oval loaves.
  4. Roll them in a mixture of wet sesame seeds, black sesame seeds, and anise seeds.
  5. Place the rings (4 per tray) onto baking trays and let them proof until doubled in size in the proofer (proofing cabinet).
  6. Preheat the oven to 200°C (392°F).
  7. Bake for 25–30 minutes until they take on a golden-brown color.

For more recipes, visit www.worldchefs.org/news.
Categories
Cultural & Heritage Recipes

Damper

See below for recipe

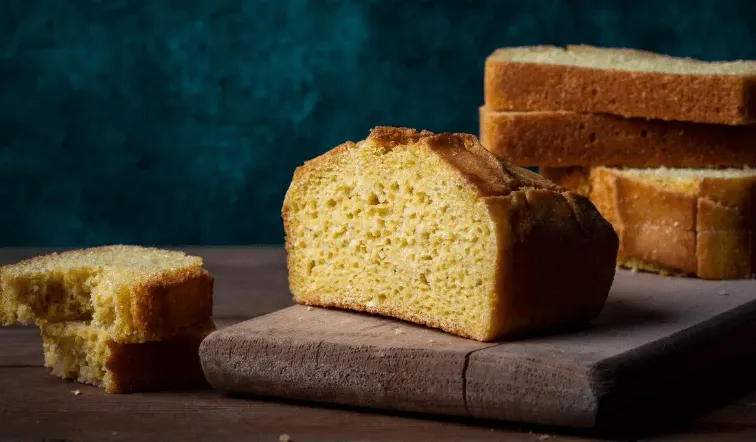
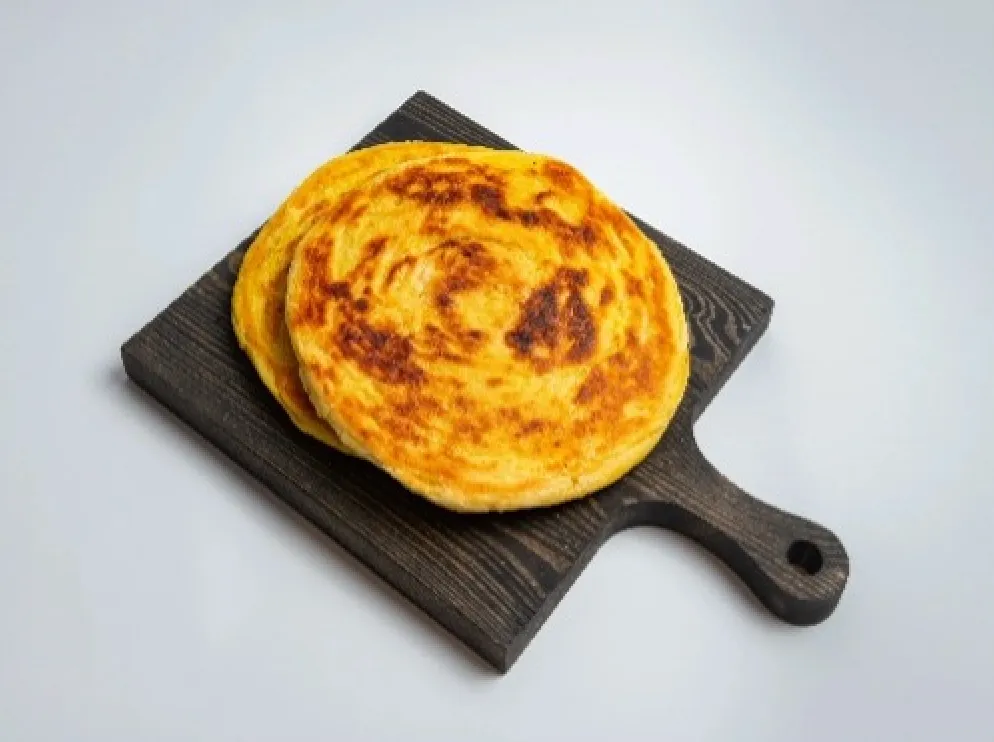
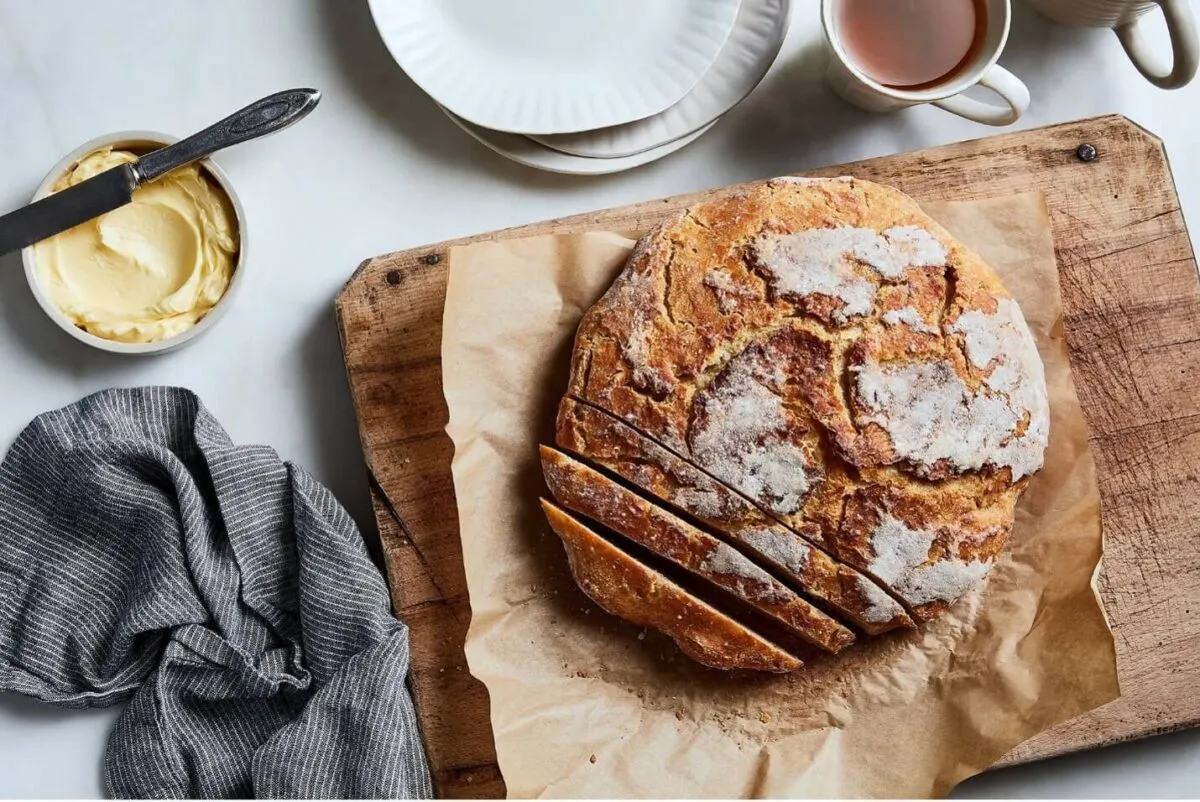
Damper is a traditional Australian bush bread made from simple ingredients like flour, water, and salt, cooked in the ashes of a campfire. Its history dates back to the early 19th century during Australia’s colonial period, serving as essential, portable sustenance for explorers and settlers. The name “damper” likely comes from a Lancashire term for something that “damps the appetite,” though another theory suggests it’s derived from the practice of “damping” a fire with ashes to preserve coals.

These days we can bake in the oven.

Damper – Recipe

Adapted by PETER TISCHHAUSER
Ingredients
  • 4 cups self-rising flour
  • 1 teaspoon salt
  • 1 tablespoon butter, softened
  • 70g milk powder
  • 1½ cup water
Instructions
  1. Preheat the oven to 220 degrees C. 
  2. Grease a baking sheet.
  3. Stir flour, Milk powder and salt together in a large bowl. Rub in butter until mixture resembles coarse crumbs. Make a well in the centre pour in water, then stir until dough comes together.
  4. Turn dough out onto a lightly floured surface and form into an 8-inch-diameter round loaf. Place loaf onto the prepared pan; cut a cross in the top using a sharp knife.
  5. Bake in the preheated oven for 25 minutes; lower the temperature to 175 degrees C and continue to bake for an additional 5 to 10 minutes. The loaf should be golden brown and the bottom should sound hollow when tapped.

For more recipes, visit www.worldchefs.org/news.
Categories
Recipes

Sustainable Recipe Series: Tortello Tricolore

See below for recipe

Tortello Tricolore by NAZARIO CONTARDI

Chef Nazario Contardi is an Alma-trained chef, born and bred in Ancona, at the forefront of sustainability in the kitchen. With his recipe, UNDERGROWTH BURNED, Nazario earned 3rd place at the 2024 LIFE Climate Smart Chefs award in the category of “Sustainable Recipe”.

“For me, sustainability is tradition—the sacred and timeless act of cooking to bring well-being to others. Within this act lies the true key: the feeling of being well. When we respect raw ingredients, we honor those who cultuvate them, those who transform them through the alchemy of cooking, and those who are nourished by them. This is where sustainability reveals its deepest meaning: an act of love that connects past, present and future.”

Chef Nazario Contardi

Chef Nazario would like to extend a thank you to the people who helped him discover the special ingredients and historical tradition brought to life through his Tortello Tricolore recipe:

“A heartfelt thank you goes to Agricoltura Rasoterra, not only for their wonderful vegetables but also for their commitment to preserving and safeguarding the flat red onion of Pedaso, a true treasure of our land. I am equally grateful to Rocca Madre for their extraordinary “Aleppo mix” flour, and to Antonietta and Davide from Le Capre di Capradosso, whose dedication to their beloved goats, cows, and sheep results in products that embody authenticity and respect for nature. A special mention goes to Gianni Chiodi, who, like the others, keeps alive ancient knowledge of olive harvesting and the protection of local varieties such as the Mignola, ensuring that this heritage continues to thrive. In my work, I am fortunate to rely on partners who make every project possible: Tiriboco Cucine, who always provides me with the right tools and equipment in the kitchen; Marco Matteucci, whose photos and videos bring stories to life with emotion and precision; and Casa della Divisa, who ensures I can step into every occasion with an elegant and impeccable uniform. Thanks Worldchefs for this special opportunity. Community is sustainability. To all of you, my sincere gratitude.”

Discover his sustainable recipe below!

Tortello Tricolore – Sustainable Recipe

BY NAZARIO CONTARDI
Ingredients
For the pasta
  • 500g Rocca Madre “Miscuglio di Aleppo” type 2 flour
  • 4 Eggs Yolk
  • 2 Whole eggs
  • 20ml Extra Virgin Olive Oil Mignola cultivar from Frantoio Chiodi
  • Salt and pepper to taste
For the pasta filling
  • 250g Fresh Ricotta “Le capre di Capradosso” Ascoli Piceno, Marche, Italy.
  • 100g stale bread
  • Salt and pepper to taste
For the green pea sauce:
  • 500g fresh shelled peas
  • 10ml Extra Virgin Olive Oil Mignola cultivar from Frantoio Chiodi
  • Salt and Pepper to taste
For the white cheese fondue:
  • 250g cow’s milk
  • 200g mature goat’s grated cheese from “Le capre di Capradosso” Ascoli Piceno, Marche, Italy.
  • 2g Horseradish
  • 10g Butter
  • Salt and pepper to taste
For the arrabbiata sauce:
  • 500g peeled tomatoes
  • 5g Sampaolesi’s Hot Experience cream with 3 types of chilli pepper
  • 4 cloves of garlic chopped
  • 30ml Extra Virgin Olive oil Mignola cultivar from Frantoio Chiodi
  • Salt and pepper to taste
FOr the broth
  • 400g goat’s cheese (used for the fondue)
  • 2 carrots
  • 2 Pedaso red onions
  • 1 celery stalk
  • Asparagus trimmings
for the asparagus:
  • 5 Asparagus separa
  • 2 ml Lemon Juice
  • Salt Oil and pepper to taste
Instructions
  1. Weigh the stale bread and mix it with ricotta, a drizzle of extra virgin olive oil, and a pinch of salt. Mix it well: the filling is ready.
  2. Knead the flour with eggs, salt, and olive oil until you get a smooth and firm dough.
  3. Roll the dough to about one millimeter thick, cut the shapes, fill them, and close the tortelli.
  4. Blanch the asparagus tips, then begin making the broth with vegetables and six-month aged cheese rinds.
  5. Chop the garlic and soften it in extra virgin olive oil. Then, add a three chili pepper cream and tomato purée. Let it simmer.
  6. Blend the peas with a bit of their cooking water.
  7. Boil the cheese rinds and dice them. Then, grate the cheese core and make a fondue, adding fresh horse-radish for contrast.
  8. Keep the Parmigiano rinds.
  9. Cook the tortelli for four minutes in salted water, then sauté them with reduced broth, a knob of butter, and a splash of cooking water.
  10. Create the tricolore: green with peas, white with the cheese fondue, red with arrabbiata sauce.
  11. Gently place the tortello, add the diced rinds, the asparagus, herbs (optional), and a spoon of the pasta’s finishing sauce. Enjoy!

“The true heart of this recipe comes from a memory: Parmigiano crusts simmering in the ragù, slowly releasing all their flavor. It’s a technique handed down from grandmothers, and for me it has always been special. When I eat pasta with ragù, I love finding those pieces of Parmigiano crust—some people adore them, others can’t stand them—but for me, it’s a taste of tradition and home. In this dish, I wanted to recreate that same feeling by roasting the cheese rinds, bringing out their deep, toasty aroma and giving the recipe an even more intense character.”

For more recipes, visit www.worldchefs.org/news.
Categories
Cultural & Heritage Recipes

Luqaimat

See below for recipe

Luqaimat is a cherished Emirati dessert that has been enjoyed for many generations.

Luqaimat – Recipe

Adapted by Atim suyatim

Yields 20 servings

Ingredients
  • Sugar, 50 gm
  • Yeast, 8 gm
  • Rice flour, 20 gm
  • Corn flour, 100 gm
  • Cardamon powder, 5 gm
  • Salt, 7 gm
  • Flour No. 1, 1200 gm
  • Rose water, 25 gm
  • Yogurt, 20 gm
  • Water, 1000 gm
  • Safron, 1 gm
  • Milk powder, 10 gm
Instructions
  1. In a bowl, mix all dry ingredients: flour, corn flour, sugar, yeast, salt, cardamom, saffron, and milk powder.
  2. Add yogurt, rose water, and water gradually.
  3. Mix into a smooth, sticky batter. Cover and rest for 45–60 minutes until doubled in size.
  4. Heat oil for frying.
  5. Drop small balls of batter into hot oil and fry until golden brown.
  6. Drain and drizzle with date syrup or sugar syrup before serving.

For more recipes, visit www.worldchefs.org/news.
Categories
Recipes

Sustainable Recipe Series: A Blossoming Future

See below for recipe

A Blossoming Future by Matteo Farsoni

Chef Matteo Farsoni is an Italian gluten-free vegan pastry chef. With his recipe, A Blossoming Future, Matteo was named the winner of the 2024 LIFE Climate Smart Chefs award for “Best Sustainable Recipe”. The Jury decided to award Chef Farsoni because his recipes represent an excellent example of the practical application of the LIFE Climate Smart Chefs sustainable principles through the creation of dishes with low environmental impact that are the result of thought and experimentation, complete and balanced, interesting, creative and aesthetically pleasing, with particular attention to zero-waste and the reuse of all ingredients.

Discover his sustainable recipe below!

A Blossoming Future – Sustainable Recipe

BY MATTEO FARSONI
Ingredients
  • 40g pasta
  • 50g spinach
  • 35g stale bread
  • salt
  • 10g olive oil
  • 45g water
  • 10g wheat flour
  • helichrysum
  • breadcrumbs
  • ricotta sauce
  • walnut paste
  • optional: herbs and flowers
Instructions
  1. Boil leftover pasta, remove from water. Then, put spinach in the same water and stir it for a few seconds before immediately transferring it to cold water.
  2. Put 40g pasta, 50g dried spinach, 10g stale bread, a pinch of salt and some olive oil in a mixer. Blend until smooth.
  3. For the white tuile, place 25g stale bread, 45g water, 10g of wheat flour, and 5g olive oil in a blender. Blend, and roll the mixture out on a baking mat. Cook it for a few minutes, then cut out disks.
  4. Next, place some helichrysum in a bowl and pour hot water over it. Let it infuse for at least 10 minutes.
  5. Take the pasta and spinach dough, cover it in breadcrumbs and roll it out into a thin log. Cut it into small pieces and shape them into small balls with your hands to get your gnocchi pasta.
  6. Place the gnocchi in boiling water. When they float to the surface, they are ready.
  7. Place the gnocchi in your plate and start piping ricotta sauce and walnut paste on top to add creaminess to the dish.
  8. Then, pipe more walnut paste on the white tuile to decorate. Add a few dollaps of ricotta sauce and add some herbs and flowers to make it look aesthetically appealing.
  9. Now, gently place the white tuile on top of the gnocchi and finish the dish by pouring the helichrysum infusion you made earlier. Enjoy!

For more recipes, visit www.worldchefs.org/news.
Categories
Cultural & Heritage Recipes

Polish Crayfish with Dill and Wine

See below for recipe

 Crayfish in Polish Culinary Heritage 

For centuries, crayfish have held a special place in Polish cuisine. Once a humble food for peasants, by the 17th century they reached aristocratic tables, influenced by German and French traditions. 

In classic Polish cooking, crayfish were true delicacies – featured in soups, aspics, sauces, pierogi fillings, and the famous crayfish butter, used as a base for the famous cardinal sauce. 

By the 19th century, Poland was among Europe’s leading exporters of crayfish, highly valued in France and Germany. Yet this tradition declined with the crayfish plague and water pollution, which nearly wiped-out native species. 

Today, thanks to sustainable farming and a revival of heritage cuisine, crayfish are slowly returning to Polish tables, especially in regions like Pomerania and Greater Poland. Celebrating crayfish means reviving not only a forgotten taste but also the artistry of cooks who once transformed them into dishes of elegance and prestige. 

The below recipe comes from a rare 1934 cookbook – now a true collector’s treasure. This unique edition has been lovingly passed down through generations by a member of the Rural Women’s Association “Wygodni Zakociacy” from Zakocie, Masovia region. Thanks to this legacy, they can preserve and celebrate some of the finest traditional recipes from Poland. 

Polish Crayfish with Dill and Wine – Recipe

Adapted by JOANNA OCHNIAK & RURAL WOMEN’S ASSOCIATION “WYGODNI ZAKOCIACY” MARSOVIA 

Yields 6-8 portions

*60 crayfish, depending on size, are usually enough for a celebratory table

Preparation time: ~30 minutes (cleaning crayfish) + 20 minutes (cooking) = ~50 minutes total 

Ingredients
  • up to 60 crayfish (various sizes may be used)
  • 50 g butter
  • ½ liter sour cream
  • ¼ liter white wine
  • a generous handful of fresh dill
  • salt, to taste
Instructions
  1. Clean the crayfish thoroughly with a brush and rinse them several times until the water runs clear. Once cleaned, scald them in salted boiling water, then cook under a lid.
  2. In a saucepan, melt the butter, add the crayfish, pour in the sour cream and wine, and sprinkle with a generous handful of finely chopped fresh dill. Season with salt to taste.
  3. Simmer gently for no longer than 20 minutes – prolonged cooking will cause the crayfish to dry out and lose their delicate flavor.

Polish Crayfish Butter – Recipe


Crayfish butter was one of the most prized foundations of classic Polish cuisine. Made by gently infusing butter with the flavor of crayfish shells and claws, it created a deep, luxurious aroma that enhanced many traditional dishes. In the 19th and early 20th centuries, crayfish butter was considered indispensable for crayfish soups, sauces, and festive dishes. 

Yields ~250 g of flavored butter (enough for 6–8 uses in soups, sauces, or spreads) 

Ingredients: 
  • shells and claws from approx. 30 crayfish 
  • 300 g butter 
  • 2 fresh bay leaves (optional) 
Instructions:
  1. Dry the crayfish shells and crush them in a mortar.
  2. In a saucepan, melt the butter and add the crushed shells together with the bay leaves.
  3. Simmer very gently over low heat for 10–15 minutes, stirring constantly to release the aroma.
  4. Strain through a fine sieve lined with cloth or paper.
  5. Pour into jars, cool, and refrigerate. 

Use: Crayfish butter was traditionally added to soups and sauces, or used to enrich festive dishes with a delicate yet distinctive flavor. 

Polish Cardinal Sauce – Recipe


The so-called “Cardinal Sauce” was one of the most refined ways to serve crayfish in Poland. Enriched with crayfish butter and cream, it combined elegance with the unmistakable aroma of crayfish meat. This sauce was a hallmark of banquets and festive meals, elevating fish and seafood dishes to true delicacies. 

Yields ~6 portions (as a sauce accompanying a main dish) 

Ingredients: 
  • 1 cup mayonnaise 
  • 4 tbsp cream 
  • ¼ liter dry white wine 
  • 100 g crayfish tails 
  • 2 tbsp crayfish butter 
  • fresh dill, finely chopped 
  • salt, pepper, and lemon juice to taste 
Instructions:
  1. Combine the mayonnaise with melted crayfish butter.
  2. Stir in the cream, wine, chopped crayfish tails, and fresh dill.
  3. Season carefully with salt, pepper, and lemon juice.
  4. Serve slightly chilled or at room temperature. 

Use: Traditionally served with crayfish, fish, or other seafood, this sauce added a note of prestige and richness to celebratory tables. 


Bon appétit – or as we say in Poland, Smacznego! 

For more recipes, visit www.worldchefs.org/news.
Subscribe

* indicates required

What are you looking for?

Generic selectors
Exact matches only
Search in title
Search in content
Post Type Selectors