See below for recipe
History of Arkansas Cheese Dip
A Cheese dip has always been more than a side dish in Arkansas. In the Natural State, it’s a comfort, a calling, and for many, a core memory.
Before it landed on fast-casual menus, late-night cravings, and TikTok tables, cheese dip was already bubbling away in a dirt floor restaurant in Hot Springs, Arkansas. What started as a humble house blend of melted cheese and spice has grown into something much bigger: a shared tradition, a source of pride, and arguably—though we’ll save that debate for another day—a contender for one of America’s great regional foods.
The story begins in 1935, when Blackie Donnelly opened Mexico Chiquito in Hot Springs. Alongside his enchiladas, he served a golden, molten cheese dip that quickly became a sensation. When Donnely later expanded to North Little Rock, cheese dip went with him, and before long other restaurants across the state followed suit. Families even began recreating it at home, each with their own spin.
When anyone claims to be the first or the best at something, they open themselves up to debate. Texans claim their chile con queso came first, but Arkansans argue our version is the original. They can undoubtedly be considered cousins. Queso is chunkier and spicier, while Arkansas cheese dip is all about a silky texture that can be scooped, drizzled or poured.
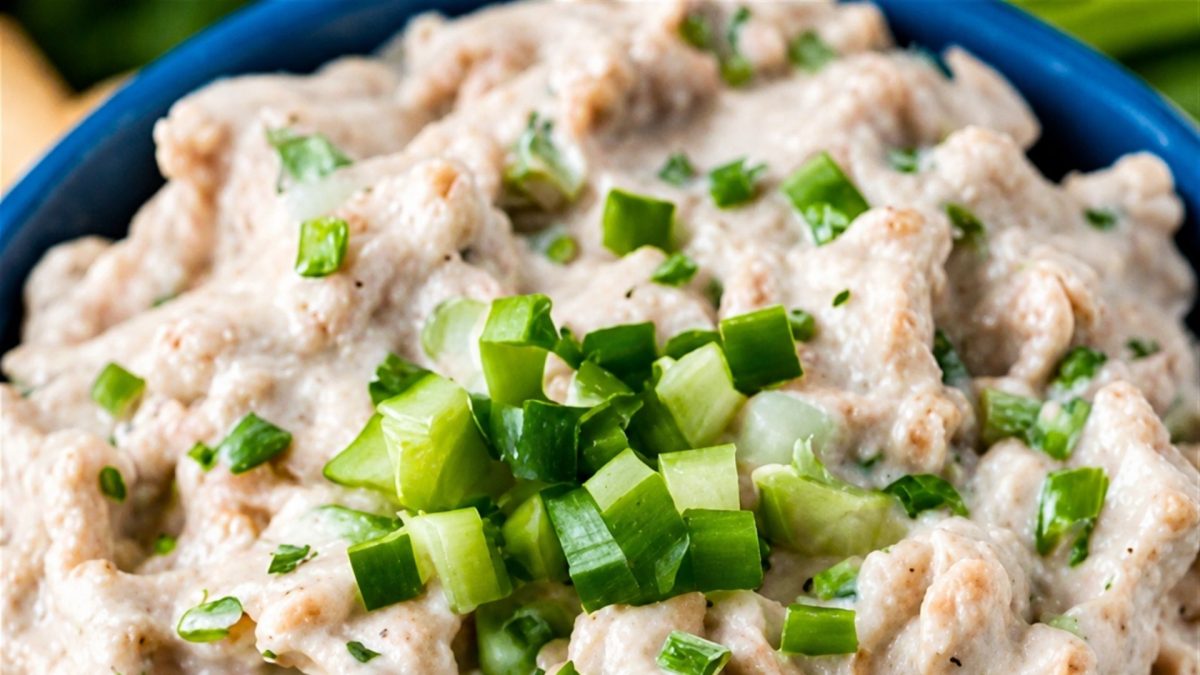
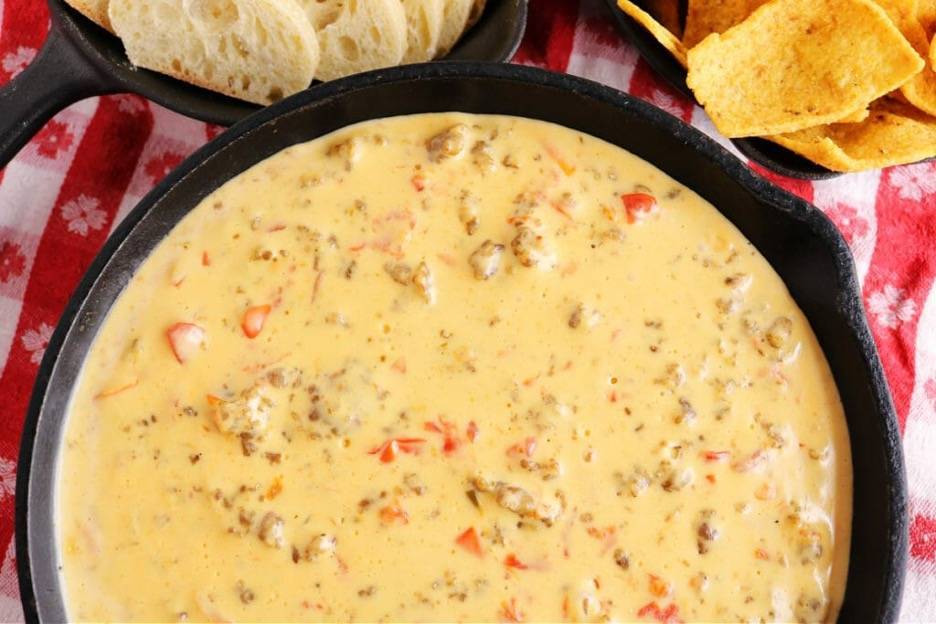
What does and doesn’t belong in cheese dip is also often debated. Donnelly’s recipe is still a closely guarded secret, but most agree it started with processed yellow cheese that was thinned with milk and lightly seasoned. Served warm in small bowls with baskets of tortilla chips, it was simple but irresistible. The desire for more of the cheesy dipped people to start recreating it at home. Cooks took to melting blocks of cheese on the stovetop and adding garlic, cumin, chili powder, or even a can of Ro-Tel. Some kept it mild, others cranked up the heat with jalapeños. Some swear by yellow American cheese, while others use white American. However it was made, the joy was the same: a bubbling bowl of cheese dip at the center of the table.
Cheese dip isn’t just a snack in Arkansas; it’s part of our culture. Nearly every restaurant serves it, it fuels Razorback watch parties, and it’s the dish Arkansans love to debate as much as sports.
That pride has stretched far beyond state lines. Cheese dip has been featured in documentaries, covered in national newspapers, and even went head-to-head against Texas queso in a 2016 blind taste test on Capitol Hill. Arkansas won, confirming what locals already knew: the best cheese dip starts right here.
Since 2010, Little Rock has hosted the World Cheese Dip Championship, where pros and home cooks compete for bragging rights. Visitors taste their way through the entries, judges pick winners, and proceeds benefit Harmony Health Clinic, a free medical and dental clinic in the city. Originally held in the fall, the event has recently teamed up with the Foam Fest Craft Beer Festival in June, bringing Arkansans together for the classic combination of beer and cheese dip.
Arkansas Cheese Dip – Recipe
RECIPE Adapted by JOHN COLETTA
Yields 20 servings
Ingredients
- 90g. Butter; Unsalted; Small Dice
- 50g. Flour; All-Purpose; Sifted
- 500ml. Milk; Whole; Pasteurized
- 15g. Butter; Unsalted; Small Dice
- 200g. Onion; Yellow or White; Peeled; Finely Minced
- 60g. Poblano Chile; Finely Minced
- 45g. Jalapeño Chile; Finely Minced
- 200g. Tomatoes; Fresh; Cored; Small Diced
- 250g. Cheese; Velveeta; Large Diced
- 250g. Cheese; Monterey Jack; Shredded
- 200g. Green Chiles; Finely Minced
- 5g. Cumin; Ground
- 3g. Salt; Sea; Fine Grind
- 2g. Chili Powder
- 2g. Garlic Powder
- 1g. Pepper; Black; Fine Grind
- 0.25g. Pepper; Cayenne
- 5g. Cilantro; Fresh; Leaves Only
- 200g. Tortilla Chips; Crisp
Instructions
- Place the butter in a heavy bottom skillet and onto a low flame. Whisk in flour, stir with a wooden spoon, cook, until fragrant, about 1 minute.
- Gradually add in milk, whisking constantly, until smooth and combined. Remove from heat; set aside.
- Melt butter in a large heavy bottom saucepan over a medium flame. Add onion, poblano, and jalapeño; cook, stirring often, until onions are translucent, 4 to 5 minutes. Stir in tomatoes, and cook, stirring often, until onions have softened and tomatoes have broken down slightly, about 3 minutes. Add the Velveeta cheese, Monterey Jack cheese, green chiles to the saucepan. Cook over medium heat, stirring constantly, until melted and smooth, about 5 minutes.
- Remove from heat, and stir in cumin, salt, chili powder, garlic powder, black pepper, and cayenne pepper.
- Transfer the Arkansas Cheese dip to an appropriate serving vessel. Garnish with cilantro, and serve hot with tortilla chips.
For more recipes, visit www.worldchefs.org/news.